Scratchduino is a project developed to help young people easily integrate physical elements in their digital creations and expand their computers’ ability to interact with the physical world, using affordable hardware.
Using Scratchduino kids can build interactive stories, animations and games that have physical elements including sensors, buttons and motors. It’s build upon the Scratch platform (as a ScratchX extension) and currently works with the Circuit Playground - a relatively cheap all-in-one board from Adafruit that has sensors and LEDs built in.
The Scratchduino project is based on work done by embeditelectronics.
The system consists of 3 parts:
- A custom firmware for the Circuit Playground
- A Chrome extension
- A ScratchX plugin (view on github)
Equipment you will need
- Laptop with Windows operation system (currently Scratchduino have limited support to MacOS)
- Circuit Playground board
- Micro-USB cable
Pre Requirements
- Chrome browser
- Adobe Flash Player
- The “Embedit Scratch Firmware” installed on your Circuit Playground board (instructions here)
Getting Started
-
Open Scratchduino by clicking here.
-
If asked, click on the “Enable Flash” label.
-
Wait until you see the warning screen (can take up to a minute), then click on the “I understand, continue” green button.
-
Click on the “Click Here” green button to install and run the “Embedit Scratch Connection App”. (Keep the current window open)
-
Install the “Embedit Scratch Connection App” by clicking on the “Add To Chrome” gray button.
-
After the installation is complete, open the “Embedit Scratch Connection” app; you can do so by clicking on the “Lunch App” green button or by clicking on the app’s icon in your Chrome app launcher. (Don’t click on the “Open Scratch” orange button)
-
Connect the Circuit Playground to your computer.
-
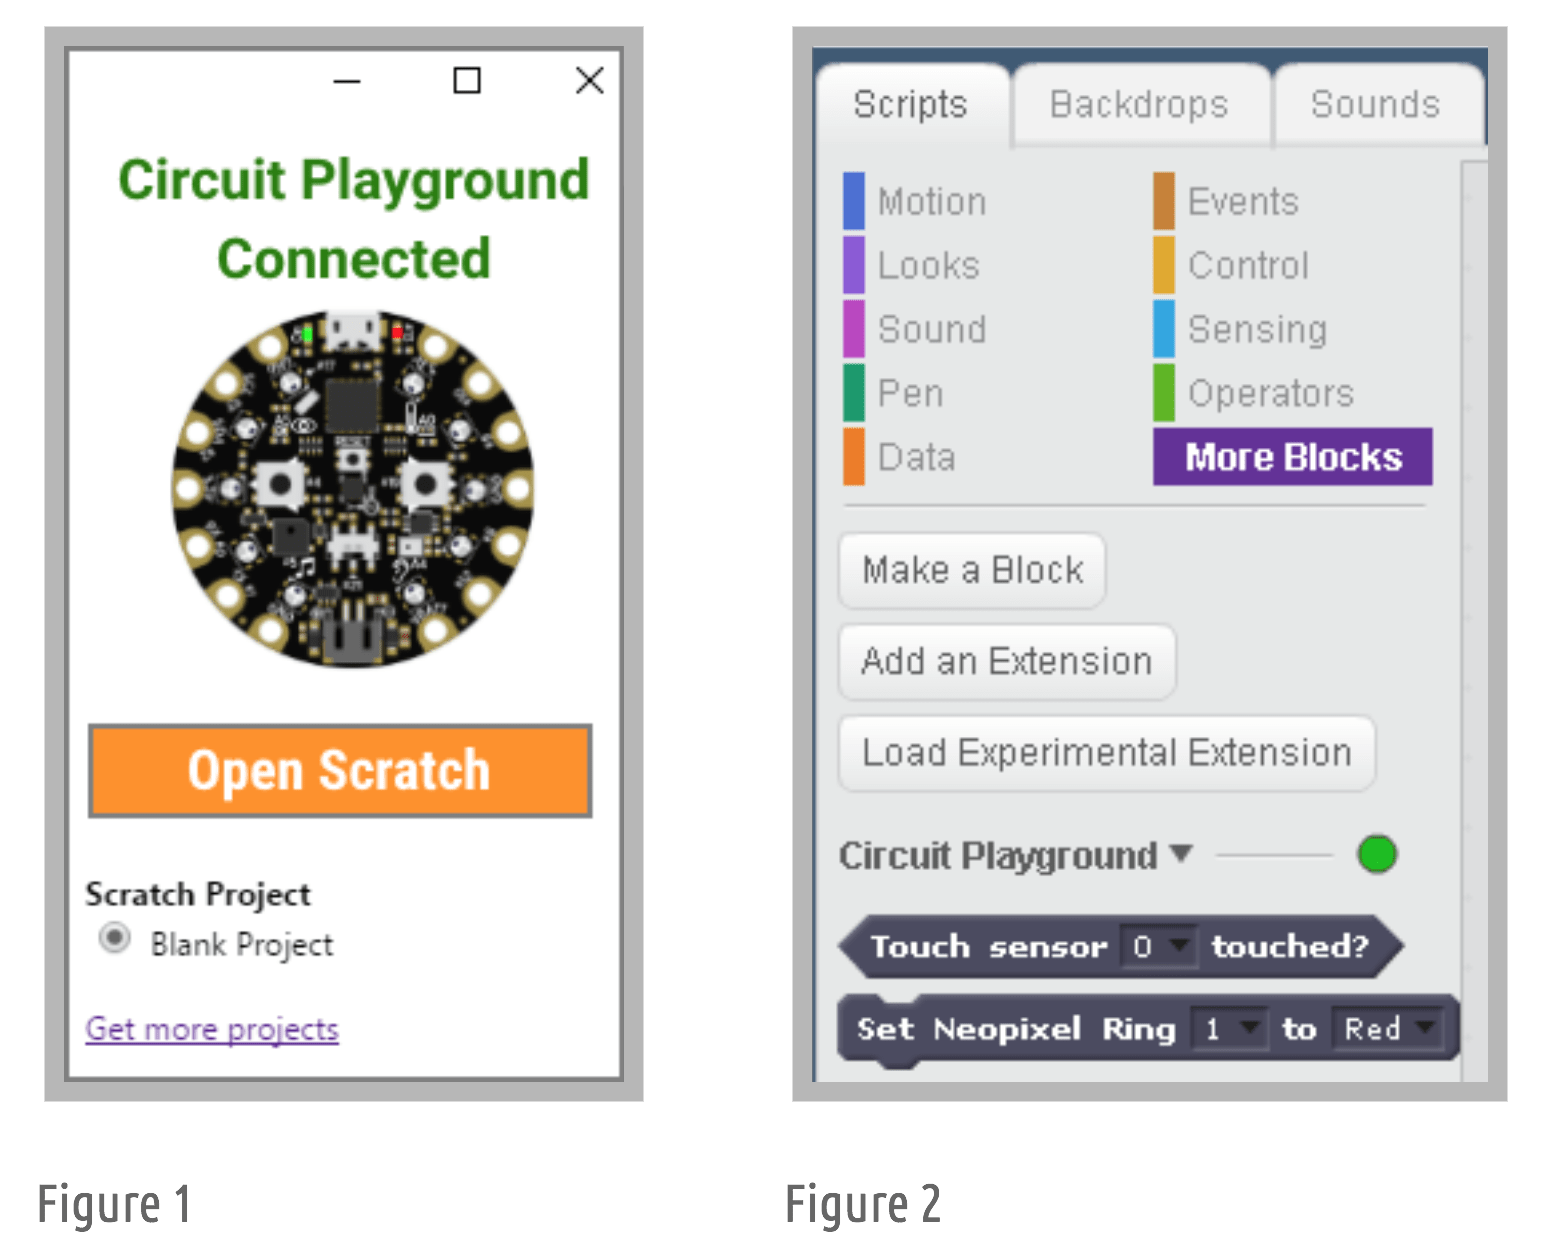
Make sure the app shows a green text saying “Circuit Playground Connected” (as shown in Figure 1 below)
-
Minimize the “Embedit Scratch Connection” window and go back to the “Scratchduino” window.
-
Make sure the Scratch program shows a green dot near the “Circuit Playground” label. (as shown in Figure 2 below)
✓ You are ready to go.
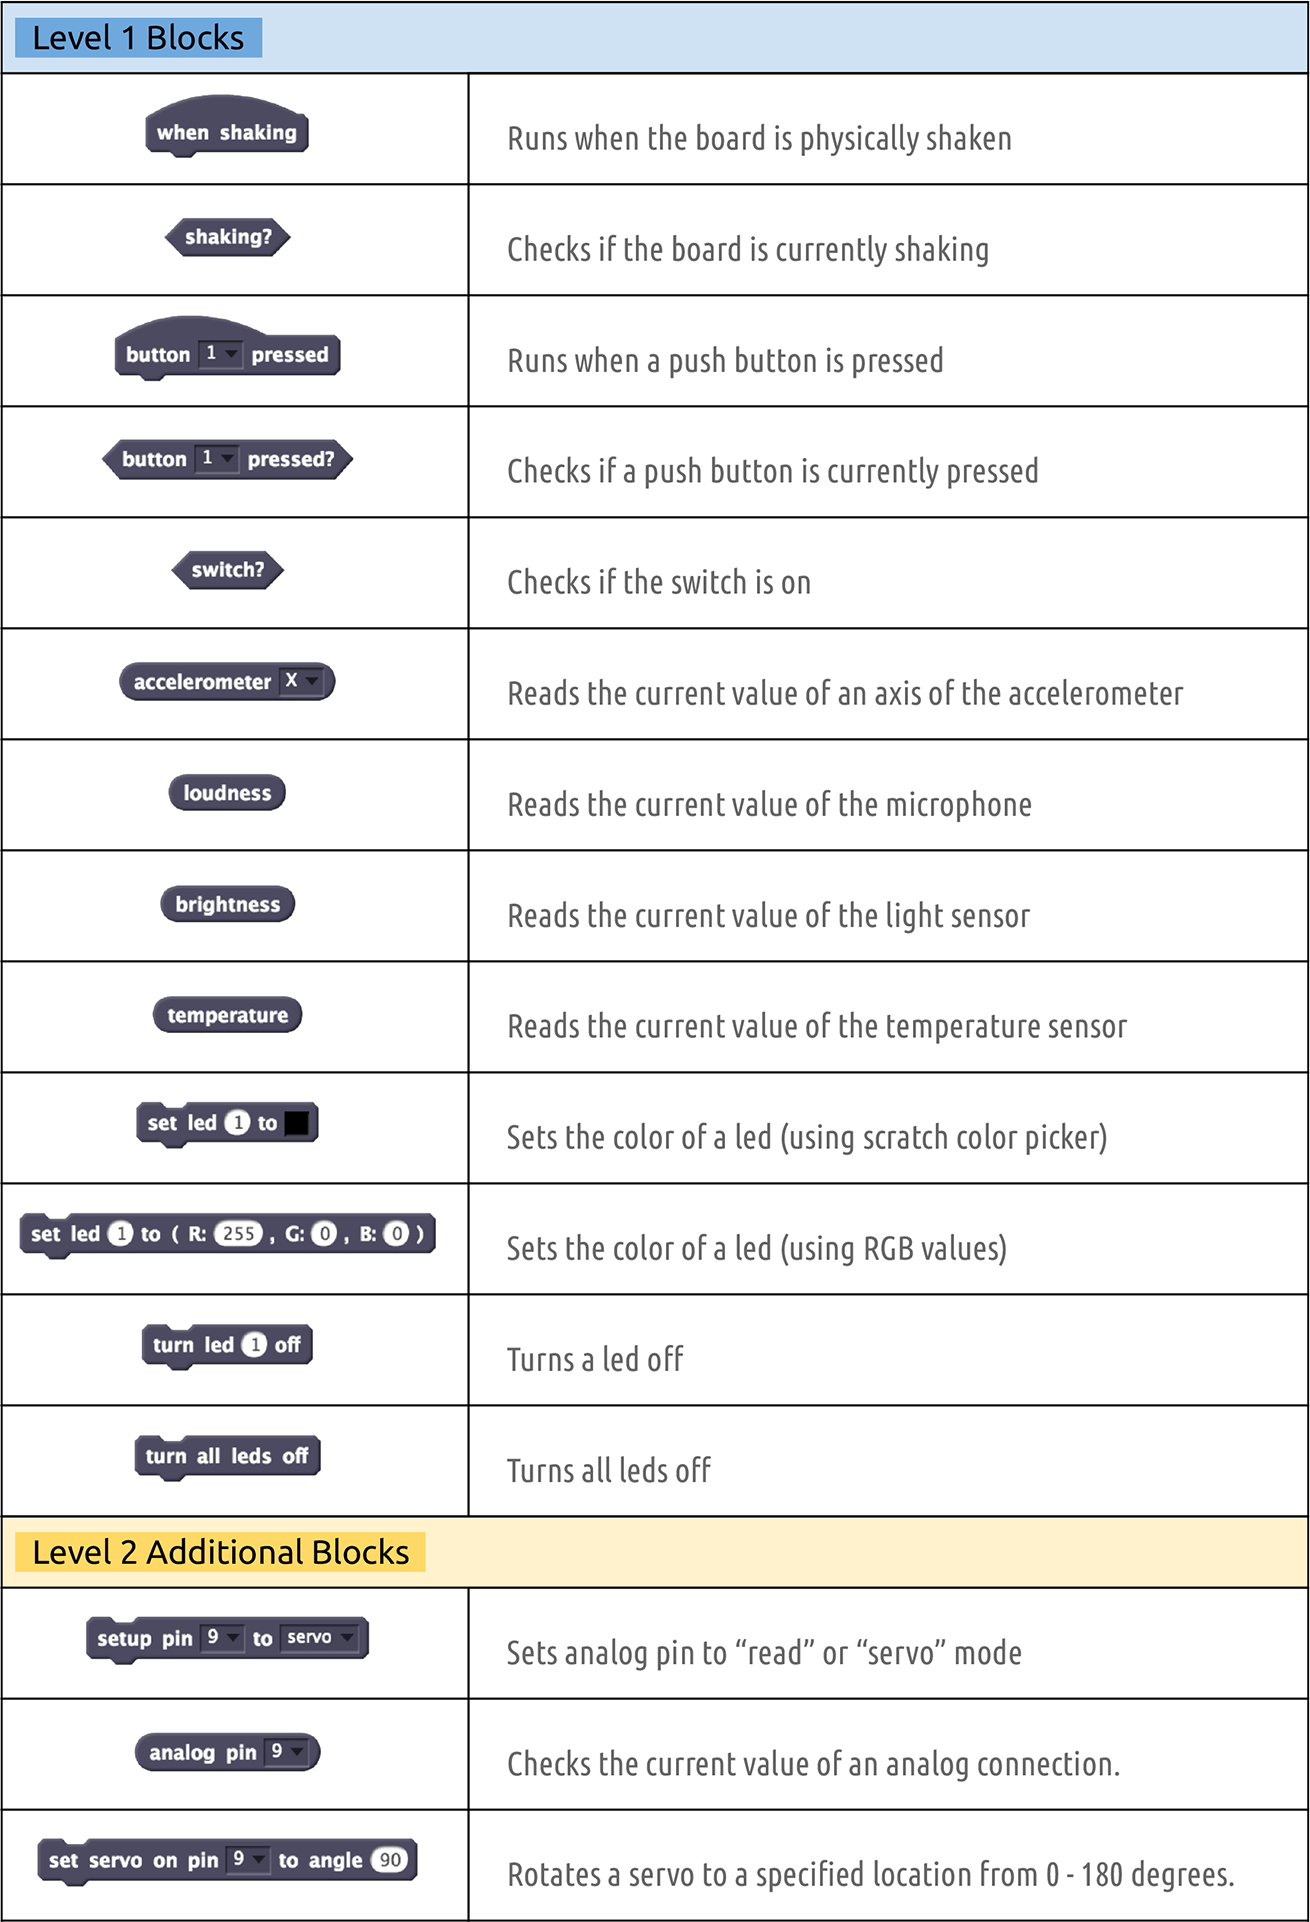
The Blocks
Demo Projects
You can import demo Scratchduino projects by clicking on File » Load Project and loading one of the demo files. You may download demo files from. Here you can find 6 simple demo files demonstrating different use cases.
Supported Languages
| en - English | ar - Arabic | he - Hebrew |
To set the block language, add &lang=XX to the ScratchX URL. Where XX = one of the two letter language codes above.
Example Link:
Level #2
Level 2 provides additional blocks to allow having analog input and control servos. Pin 9 and 10 on the board can be used for both “analog” or “servo” modes while pin 12 is always for analog input.
To set the level, add &level=X to the ScratchX URL. Where X is the number of the desired level (starting from 1).
Example Links:
-
http://scratchx.org/?url=https://hasanaboshally.github.io/scratchduino/circuitx.js&level=2
-
http://scratchx.org/?url=https://hasanaboshally.github.io/scratchduino/circuitx.js&lang=ar&level=2
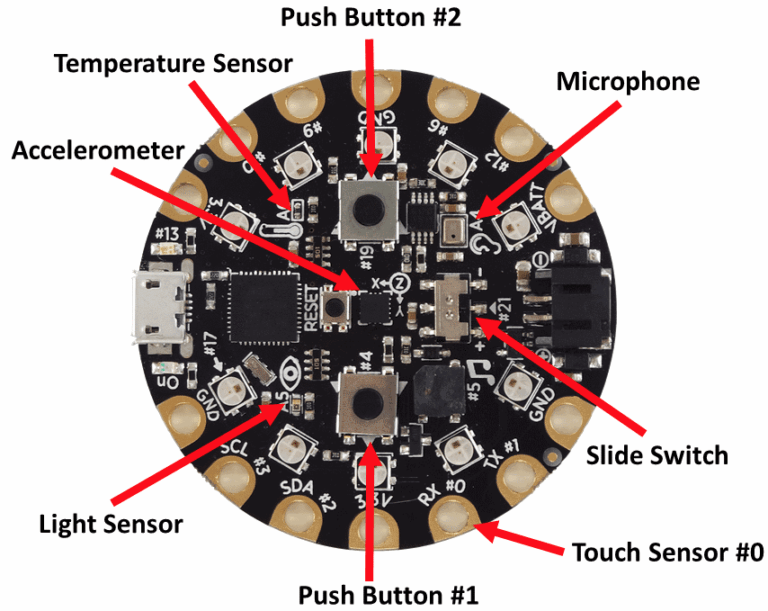
The Circuit Playground